
honeywell th8320u1008 installation manual pdf
Overview of the Honeywell TH8320U1008 Thermostat
The Honeywell TH8320U1008 is a VisionPRO 8000 Series touch-screen programmable thermostat designed for 24 Vac or 750 mV heating and cooling systems. It offers up to 3 Heat/2 Cool stages‚ humidity control‚ and Wi-Fi connectivity for remote access. This ENERGY STAR-certified thermostat provides precise temperature control‚ energy efficiency‚ and user-friendly features like vacation mode and programmable scheduling. The thermostat is compatible with various HVAC systems and requires proper installation as outlined in its manual to ensure optimal performance and safety.
1.1 Key Features of the Honeywell TH8320U1008
The Honeywell TH8320U1008 offers a touch-screen interface‚ programmable scheduling‚ and compatibility with 3 Heat/2 Cool systems. It features humidity control‚ ENERGY STAR certification‚ and Wi-Fi connectivity for remote access. Designed for 24 Vac or 750 mV systems‚ it ensures precise temperature control and energy efficiency‚ making it a versatile and advanced thermostat for modern HVAC needs.
1.2 Compatibility with Heating and Cooling Systems
The Honeywell TH8320U1008 is compatible with 24 Vac heating and cooling systems‚ including 750 mV heating systems. It supports up to 3 Heat/2 Cool stages‚ ensuring flexibility for various HVAC configurations. This thermostat is designed to work seamlessly with conventional systems‚ providing precise control and energy efficiency across different setups.
1.3 Touchscreen Programmable Thermostat Benefits
The Honeywell TH8320U1008 features an intuitive touch-screen interface for easy programming and operation. It offers advanced scheduling‚ vacation mode‚ and remote access via Wi-Fi. The thermostat’s programmable capabilities optimize energy usage‚ reducing utility bills. Its humidity control and dehumidification features enhance comfort‚ while the ENERGY STAR certification ensures energy efficiency‚ making it a versatile and convenient solution for home climate control.
Importance of the Honeywell TH8320U1008 Installation Manual
The manual ensures safe installation‚ optimizes performance‚ and provides clear guidance for configuration and troubleshooting‚ making it essential for both installers and users.
2.1 Safety Precautions During Installation
Always disconnect power before starting installation to avoid electrical shocks. Wear protective gear and ensure the area is clear of debris. Avoid damaging wires or components‚ as this can lead to system malfunctions. Follow the manual’s instructions carefully‚ and do not bypass safety features. Proper installation ensures safe operation and prevents potential hazards like electrical fires or system damage.
2.2 Step-by-Step Installation Guidance
Mount the wall plate and connect wiring according to the manual. Install the thermostat by attaching it to the wall plate and configuring settings. Set up Wi-Fi for remote access. Program schedules and enable advanced features. Test operation to ensure proper heating and cooling functionality. Follow instructions carefully to avoid errors and ensure optimal performance.
2.3 Troubleshooting Common Issues
Address common issues like display malfunctions or incorrect temperature readings by checking wiring connections. Ensure power is disconnected before repairs. Reset the thermostat by removing batteries or switching off the circuit breaker. Consult the manual for detailed solutions to issues like connectivity problems or staging malfunctions. Follow diagnostic steps to restore optimal functionality.
System Requirements and Compatibility
- Compatible with 24 Vac and 750 mV heating/cooling systems.
- Supports up to 3 Heat/2 Cool staging configurations.
- Requires proper voltage and wiring for optimal performance.
3.1 Supported HVAC System Types
The Honeywell TH8320U1008 supports 24 Vac heating and cooling systems‚ including conventional‚ heat pump‚ and dual-fuel configurations. It is also compatible with 750 mV heating systems. The thermostat works with up to 3 Heat/2 Cool staging systems‚ ensuring flexibility for various HVAC setups. Its universal design allows seamless integration with most residential heating and cooling systems.
3.2 Voltage and Power Requirements
The Honeywell TH8320U1008 requires 24 V AC power and is compatible with 24 Vac heating and cooling systems. It can also operate with 750 mV heating systems. The thermostat may be hardwired or use batteries for backup power. Ensure the system meets these voltage requirements to avoid damage and ensure proper functionality. Always verify power sources before installation.
3.3 Staging Capabilities (3 Heat/2 Cool)
The Honeywell TH8320U1008 supports up to 3 heat stages and 2 cool stages‚ enabling precise temperature control for various HVAC systems. This staging capability optimizes energy efficiency by adjusting heating and cooling output based on demand. It ensures consistent comfort while minimizing energy usage‚ making it suitable for systems with multiple stages of operation.
Pre-Installation Preparation
Ensure the site is ready by disconnecting power‚ removing the old thermostat‚ and gathering necessary tools and materials before starting the installation process.
4.1 Tools and Materials Needed
To install the Honeywell TH8320U1008‚ you will need basic tools like screwdrivers‚ pliers‚ and a voltage tester. Additional materials include wire nuts‚ labels‚ and wall anchors. Ensure you have the installation manual and any Honeywell-provided accessories. Optional items like a level or drill may also be useful. Always disconnect power before starting work for safety.
4.2 Disconnecting Power and Preparing the Site
Before installation‚ turn off the HVAC system at the circuit breaker or fuse box. Verify the power is off using a voltage tester. Remove the old thermostat faceplate and gently pull it away from the wall without disconnecting wires. Clean the area around the wall plate and label wires for identification. Some models may require removing batteries before proceeding.
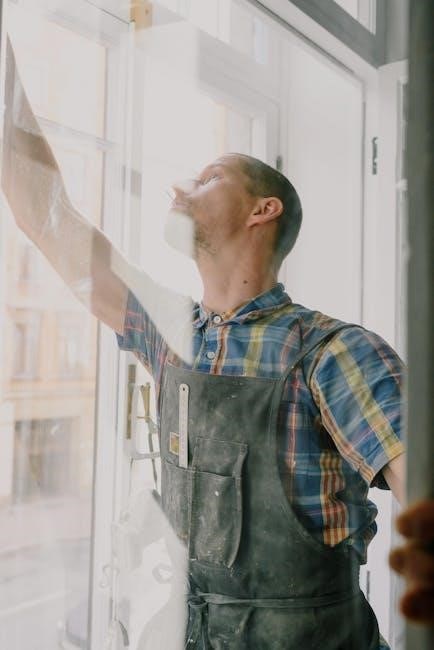
4.3 Removing the Old Thermostat
Turn off power to the HVAC system at the circuit breaker. Gently pull the old thermostat away from the wall‚ taking care not to damage the wires. Disconnect the wires from the old thermostat and label them for identification. Remove any remaining adhesive or debris from the wall to prepare for the new installation. Ensure the area is clean and dry before proceeding.
Installation Process
Mount the wall plate‚ connect the wires according to the manual‚ and install the thermostat. Configure settings‚ ensuring proper wiring and system compatibility for optimal performance.
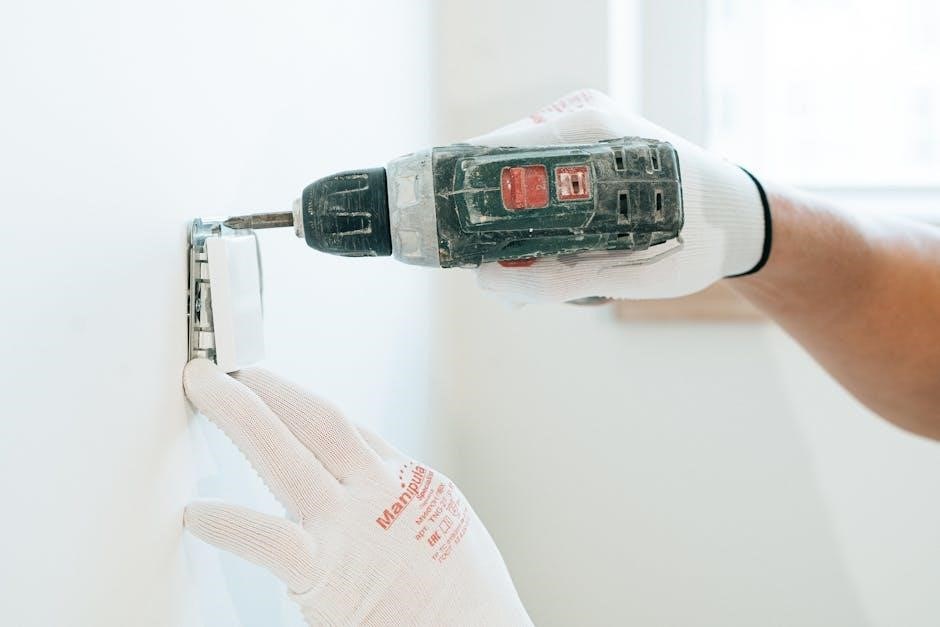
5.1 Mounting the Wall Plate
Mount the wall plate on a flat surface‚ typically 5 ft above the floor‚ ensuring it’s level. Use the included hardware to secure it to the wall. Cover any marks from the old thermostat with the provided trim plate. This step ensures a clean and professional installation‚ following the manual’s guidelines for proper placement and alignment.
5.2 Wiring the Thermostat
Disconnect power before wiring. Follow the wiring guide to connect terminals correctly. Ensure proper wire connections for heating‚ cooling‚ and power. Optional features like Wi-Fi require additional setup. Double-check connections and refer to the manual for specific configurations. After wiring‚ restore power and test the thermostat to ensure all systems function correctly.
5.3 Installing and Configuring the Thermostat
Mount the thermostat on the wall plate‚ ensuring level placement. Power on the device and follow on-screen prompts for initial setup. Configure temperature preferences‚ scheduling‚ and advanced features like Wi-Fi connectivity. Set up humidity control and vacation mode if applicable. Test all functions to ensure proper operation. Refer to the manual for detailed configuration guidance.
Post-Installation Setup
Configure temperature schedules‚ enable advanced features like humidity control and Wi-Fi‚ and test thermostat operation to ensure all functions work correctly after installation.
6.1 Programming the Thermostat Schedule
Program the Honeywell TH8320U1008 thermostat to customize temperature settings for different times of the day and days of the week. Use the touch-screen interface to set up to four daily periods‚ ensuring energy efficiency and comfort. The thermostat allows for automatic or manual changeover between heating and cooling modes‚ with options to enable vacation mode for extended periods away.
6.2 Setting Up Advanced Features
The Honeywell TH8320U1008 offers advanced features like humidity control and dehumidification‚ enhancing indoor air quality. Enable Wi-Fi connectivity for remote access via the Honeywell Home app‚ allowing temperature adjustments and schedule changes from anywhere. Refer to the installation manual for step-by-step guidance on configuring these features for optimal performance.
6.3 Testing the Thermostat Operation
After installation‚ test the Honeywell TH8320U1008 by checking basic functions like heating‚ cooling‚ and fan modes. Ensure temperature adjustments trigger the HVAC system and verify humidity control if equipped. Test programmable schedules and Wi-Fi connectivity for remote access; Activate vacation mode to confirm energy-saving functionality. Address any issues using the troubleshooting guide in the manual for optimal performance.
Advanced Features and Configuration
The Honeywell TH8320U1008 offers advanced features like humidity control‚ vacation mode‚ and Wi-Fi connectivity for remote access‚ ensuring energy efficiency and user convenience through customizable settings.
7.1 Humidity Control and Dehumidification
The Honeywell TH8320U1008 features advanced humidity control‚ allowing users to set custom humidity levels. This prevents moisture buildup‚ enhancing comfort and protecting homes from mold. The thermostat integrates seamlessly with dehumidification systems‚ ensuring optimal indoor air quality. Proper configuration through the installation manual is essential for accurate humidity management and system compatibility.
7.2 Vacation Mode and Energy Savings
The Honeywell TH8320U1008 offers a convenient vacation mode‚ allowing users to set energy-saving temperatures when away. This feature helps reduce energy consumption without compromising comfort. The thermostat also supports programmable schedules and smart adjustments‚ ensuring efficient heating and cooling. By optimizing settings‚ users can lower utility bills while maintaining a comfortable environment during absences.
7.3 Wi-Fi Connectivity and Remote Access
The Honeywell TH8320U1008 features Wi-Fi connectivity‚ enabling remote access through Honeywell’s Home app. Users can monitor and adjust temperatures‚ set schedules‚ and receive notifications from their smartphones. This feature enhances convenience and energy efficiency‚ allowing for seamless control of your HVAC system from anywhere with an internet connection.
Troubleshooting and Maintenance
Troubleshooting common issues and performing routine maintenance ensure optimal performance. Regularly clean the thermostat‚ check wiring connections‚ and update firmware to resolve issues and maintain efficiency.
8.1 Common Issues and Solutions
Common issues include display malfunctions‚ connectivity problems‚ and unresponsive touchscreens. Solutions involve resetting the thermostat‚ checking power connections‚ and ensuring proper Wi-Fi setup. Updating firmware or consulting the manual often resolves these issues effectively‚ ensuring the system operates smoothly and efficiently without further complications or downtime.
8.2 Routine Maintenance Tips
- Clean the touchscreen regularly to ensure responsiveness.
- Check and replace batteries (if applicable) to prevent power issues.
- Verify power connections and wiring for stability.
- Update firmware to access the latest features and fixes.
- Inspect and clean the thermostat’s internal components annually.
8.3 Updating Firmware and Software
Regularly update the Honeywell TH8320U1008 thermostat’s firmware and software to access new features‚ improve performance‚ and resolve issues. Use the thermostat’s Wi-Fi connectivity to download updates automatically or manually through the menu. Always follow on-screen instructions and avoid interrupting the update process to prevent system corruption. Updated firmware ensures optimal functionality and compatibility with your HVAC system.
Additional Resources and Support
Access online guides‚ Honeywell customer support‚ and community forums for comprehensive troubleshooting‚ installation advice‚ and software updates to ensure optimal performance of your thermostat.
9.1 Online Documentation and Guides
The Honeywell TH8320U1008 installation manual and user guide are available online as downloadable PDFs. These documents provide detailed instructions for installation‚ programming‚ and troubleshooting. Additional resources include setup guides‚ advanced feature configurations‚ and energy-saving tips. Users can access these materials directly from Honeywell’s official website or through authorized distributors‚ ensuring easy reference for optimal thermostat performance and maintenance.
9.2 Honeywell Customer Support Options
Honeywell offers comprehensive customer support‚ including phone‚ email‚ and live chat assistance. Their website provides detailed FAQs‚ troubleshooting guides‚ and direct access to customer care professionals. For specific inquiries about the TH8320U1008‚ users can visit http://yourhome.honeywell.com or contact Honeywell Customer Care for personalized help‚ ensuring timely resolution of installation or operational issues.
9.3 Community Forums and User Discussions
Online forums and user discussions provide valuable insights and support for the Honeywell TH8320U1008. Communities like Honeywell’s official forums offer troubleshooting tips‚ installation advice‚ and shared experiences from users and experts. These platforms allow users to engage‚ ask questions‚ and find solutions‚ making them a key resource for optimizing thermostat performance and addressing specific installation challenges effectively.
The Honeywell TH8320U1008 installation manual is a comprehensive guide ensuring proper setup and operation. It provides clear instructions for installing‚ configuring‚ and maintaining the thermostat‚ optimizing energy efficiency and user convenience for a comfortable home environment.
10.1 Summary of Key Installation Steps
Disconnect power‚ prepare the site‚ and remove the old thermostat. Mount the wall plate‚ wire the thermostat‚ and install it. Configure settings‚ program schedules‚ and test operation. Ensure all connections are secure and settings are customized for optimal performance and energy efficiency. Follow manual instructions carefully for a successful setup and reliable functionality.
10.2 Final Checks for Optimal Performance
After installation‚ test the thermostat’s operation‚ ensuring proper heating and cooling cycles. Verify all wiring connections and settings‚ including temperature accuracy and humidity control. Review programmed schedules and advanced features like Wi-Fi connectivity. Conduct a complete system test to ensure seamless functionality and energy efficiency. Confirm settings are optimized for performance and energy savings.