
sun joe pressure washer soap instructions
Sun Joe Pressure Washer Soap Instructions: A Comprehensive Guide
Navigating the world of pressure washing requires understanding optimal soap usage for effective cleaning. This guide details how to properly utilize soap with your Sun Joe pressure washer‚ ensuring peak performance and longevity.
Understanding Sun Joe Pressure Washers & Soap
Sun Joe pressure washers are renowned for their affordability and versatility‚ catering to a wide range of cleaning tasks around the home and garden. However‚ maximizing their cleaning power hinges on understanding how they interact with detergent solutions. Unlike some pressure washers‚ not all Sun Joe models feature built-in soap tanks; some rely on siphon tubes drawing soap from a separate container.
The type of soap used is crucial. Standard dish soap‚ for instance‚ can create excessive foam and potentially damage the pump. Specifically formulated pressure washer detergents are designed to be low-sudsing and compatible with the machine’s internal components. These detergents effectively lift dirt‚ grime‚ and mildew without causing operational issues. Understanding your specific Sun Joe model and its soap application system is the first step towards achieving optimal cleaning results.
Types of Sun Joe Pressure Washers Compatible with Soap
Sun Joe categorizes its pressure washers with varying soap application capabilities. Models like the SPX series (SPX3000‚ SPX3001‚ etc.) generally feature onboard soap tanks‚ simplifying the detergent addition process. These tanks allow for easy filling and concentration adjustment.
Conversely‚ some entry-level or compact Sun Joe models‚ such as certain SJ series washers (SJ5001P‚ SJ5002P)‚ utilize a siphon hose system. This requires placing the hose into a separate bucket of detergent‚ allowing the washer to draw the soap as needed. It’s vital to confirm your model’s specific setup before attempting soap application. Electric models are generally compatible with most pressure washer soaps‚ while gas-powered versions may have specific detergent recommendations. Always consult your owner’s manual to ensure compatibility and avoid potential damage.
Choosing the Right Soap for Your Sun Joe Washer
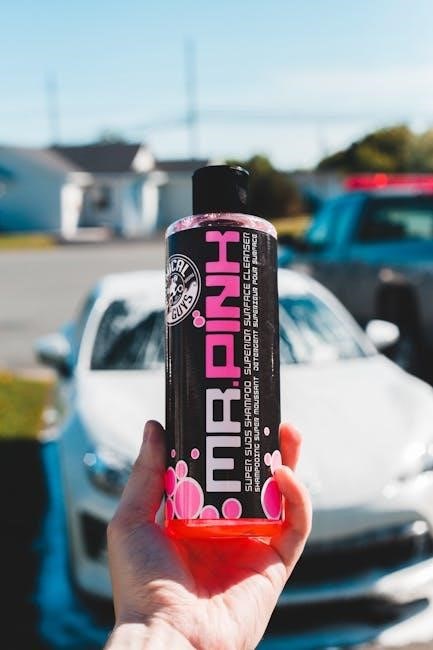
Selecting the appropriate soap is crucial for effective cleaning and protecting your Sun Joe pressure washer. Avoid using household detergents like laundry soap‚ dish soap‚ or bleach‚ as these can corrode the pump‚ valves‚ and seals. Opt for detergents specifically formulated for pressure washers.
Consider the surface you’re cleaning. For cars and delicate surfaces‚ use a car wash soap. For decks‚ siding‚ and concrete‚ choose a dedicated outdoor cleaning solution. Sun Joe offers its own line of detergents designed for optimal performance with their washers. Look for soaps labeled as “low-foam” or “biodegradable” for environmentally friendly options. Always check the soap’s dilution ratio and follow the instructions carefully to avoid residue or damage. Using the wrong soap can void your warranty‚ so prioritize pressure washer-specific formulations.
Sun Joe Specific Soap Options
Sun Joe offers a range of detergents specifically engineered for their pressure washers‚ ensuring optimal performance and protecting your investment. The Snow Joe Auto Car Wash Soap is ideal for vehicles‚ providing a gentle yet effective clean without damaging paint. For tougher outdoor tasks‚ consider the Sun Joe House & Siding Wash‚ formulated to remove dirt‚ grime‚ and mildew from various surfaces.
The Sun Joe Concrete & Driveway Cleaner tackles stubborn stains on concrete‚ patios‚ and driveways. Sun Joe also provides a Multi-Surface Cleaner‚ a versatile option for various cleaning needs. These detergents are designed with low-foam formulas to prevent damage to your pressure washer’s pump; Utilizing Sun Joe’s branded soaps guarantees compatibility and maximizes cleaning efficiency‚ offering peace of mind alongside a sparkling clean result.
General Soap Compatibility
While Sun Joe detergents are recommended‚ many commercially available pressure washer soaps can be used with your machine‚ provided they meet specific criteria. Crucially‚ always opt for detergents specifically labeled as safe for pressure washers. Avoid using household detergents like dish soap‚ laundry detergent‚ or bleach‚ as these can corrode the pump‚ damage seals‚ and void your warranty.
Low-foam formulas are essential; excessive foaming can damage the motor. Biodegradable soaps are environmentally friendly and often a good choice. Before using any third-party soap‚ test it in a small‚ inconspicuous area to ensure it doesn’t discolor or damage the surface. Always refer to your Sun Joe pressure washer’s manual for specific compatibility guidelines and recommendations to maintain optimal performance and longevity.

Preparing Your Sun Joe for Soap Application
Before applying soap‚ locate the detergent tank and ensure it’s clean. Properly preparing your Sun Joe ensures efficient soap intake and prevents potential clogs during operation.
Locating the Soap Tank
Identifying the soap tank on your Sun Joe pressure washer is the crucial first step. The location varies slightly depending on the specific model‚ but it’s generally found on the main body of the unit. Look for a translucent or opaque container‚ often cylindrical‚ with a screw-on cap labeled “Detergent” or displaying a soap droplet icon.
On many models‚ like the SPX series‚ the soap tank is positioned near the high-pressure hose connection. It might be slightly recessed to protect it from accidental damage. Some older or more compact models may have a smaller‚ integrated soap reservoir directly within the pump housing. Consult your Sun Joe’s owner’s manual for a precise diagram illustrating the soap tank’s location for your particular model.
Carefully examine the unit; don’t force anything open. If you’re still unsure‚ a quick online search for your model number accompanied by “soap tank location” will usually yield helpful images or videos. Knowing exactly where the tank is located will streamline the soap application process and prevent frustration.
Filling the Soap Tank
Once located‚ filling the soap tank is a straightforward process. Begin by unscrewing the detergent tank cap – ensure the pressure washer is switched off and disconnected from the power source before doing so. Slowly pour your chosen Sun Joe-compatible detergent or a generally compatible soap into the tank‚ being careful not to overfill it.
Most tanks have a maximum fill line indicated on the container; do not exceed this level. Overfilling can cause soap to prematurely enter the pump and potentially cause issues. For optimal results‚ use a funnel to prevent spills. After filling‚ securely screw the cap back onto the tank‚ ensuring a tight seal to prevent leaks during operation.
Always use detergents specifically designed for pressure washers‚ as household cleaners can damage the pump. Avoid thick or viscous solutions‚ as they may clog the system. Regularly check the soap level before each use to maintain consistent cleaning performance.
Adjusting Soap Concentration
Sun Joe pressure washers typically feature a dial or lever to control soap concentration. This allows you to customize the soap-to-water ratio based on the cleaning task and the level of dirt or grime. A lower concentration is suitable for light cleaning‚ such as rinsing cars or patio furniture‚ while a higher concentration is ideal for tackling tougher stains like mildew or oil.
Experiment with different settings to find the optimal balance for your specific needs. Start with a lower concentration and gradually increase it until you achieve the desired cleaning power. Avoid using excessive soap‚ as it can leave a residue and require more rinsing.
Refer to your Sun Joe model’s manual for specific instructions on adjusting the soap concentration. Some models offer pre-set options‚ while others allow for precise adjustments. Proper concentration ensures effective cleaning without damaging surfaces or wasting detergent.
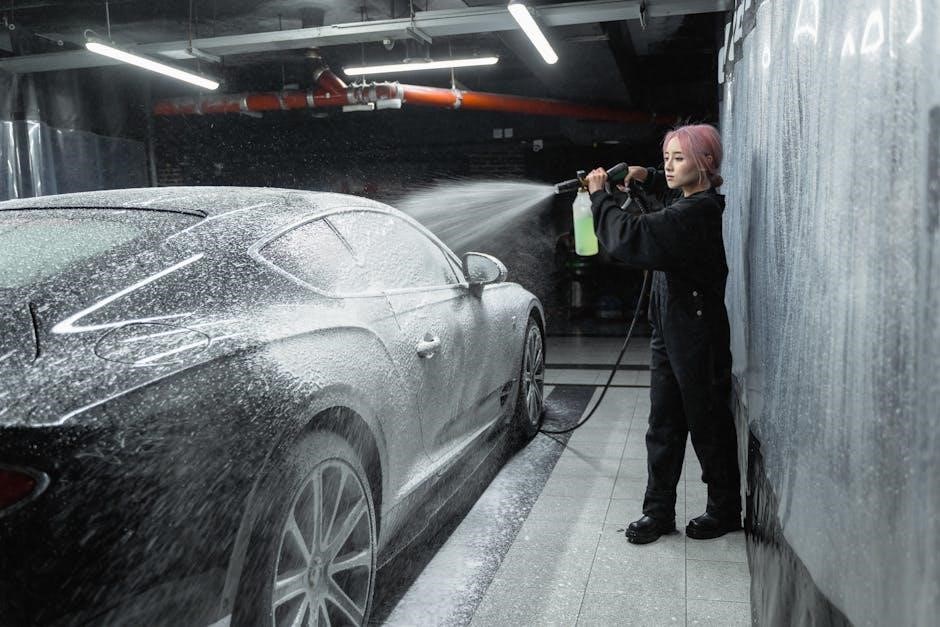
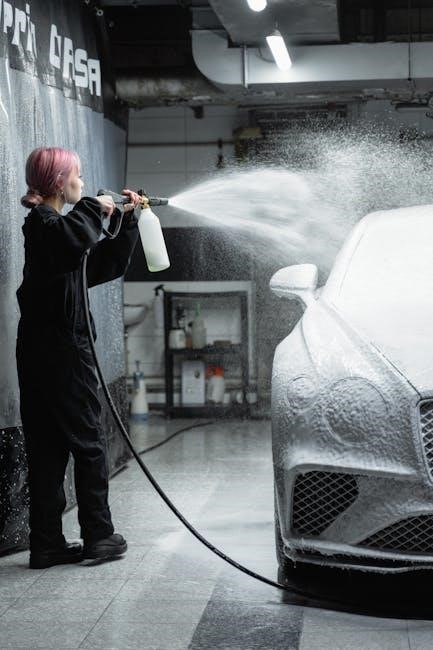
Applying Soap with Your Sun Joe
Efficiently applying soap requires the correct nozzle and settings. Proper technique ensures thorough coverage and optimal cleaning power‚ maximizing your Sun Joe’s performance.
Attaching the Soap Nozzle
Successfully applying detergent begins with correctly attaching the soap nozzle to your Sun Joe pressure washer’s spray wand. First‚ ensure the power switch is OFF and the unit is disconnected from the power source for safety. Locate the quick-connect mechanism on the spray wand – it’s typically a colored collar or button.
Gently depress the quick-connect button and remove any existing nozzle currently attached. Now‚ take your dedicated soap nozzle (often white or a different color than the high-pressure nozzles) and align it with the quick-connect fitting. Push the soap nozzle firmly into the fitting until you hear a distinct ‘click’‚ confirming a secure connection.
A loose connection can result in inconsistent soap flow or leakage. Double-check that the nozzle is firmly seated. Some models may have a rotating collar to lock the nozzle in place; ensure this is also secured. Refer to your Sun Joe’s user manual for specific nozzle attachment instructions tailored to your model.
Selecting the Soap Application Setting
Once the soap nozzle is attached‚ the next crucial step is selecting the appropriate soap application setting on your Sun Joe pressure washer. Most Sun Joe models feature a dial or selector switch specifically for detergent application. This dial typically has settings like “Low‚” “Medium‚” “High‚” or a symbol representing soap dilution.
Begin with the “Low” setting‚ especially for initial applications or delicate surfaces. This provides a gentler soap flow‚ preventing potential damage. If the cleaning power is insufficient‚ gradually increase the setting to “Medium” or “High.” Remember‚ higher settings deliver a more concentrated soap solution.
Avoid using the highest setting for all cleaning tasks‚ as it can lead to excessive foaming or residue. Consult your Sun Joe’s manual for recommended settings based on the type of soap and the surface you’re cleaning. Proper setting selection optimizes cleaning performance and minimizes soap waste.
Proper Spraying Technique for Soap
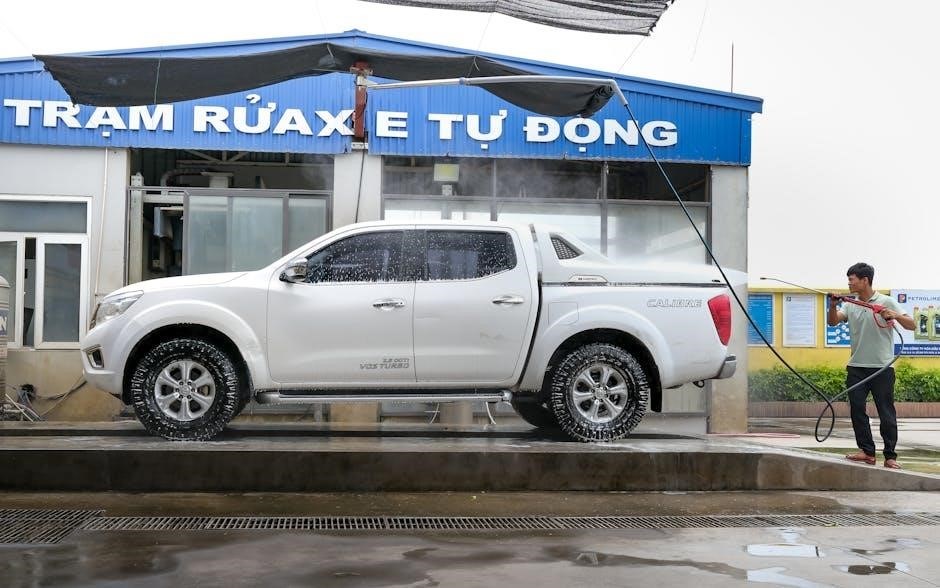
Effective soap application isn’t just about the machine; your spraying technique significantly impacts cleaning results. Maintain a consistent distance of 6-12 inches from the surface while applying soap. Avoid holding the nozzle too close‚ which can cause streaking‚ or too far‚ reducing effectiveness.
Use a sweeping motion‚ overlapping each pass slightly to ensure complete coverage. Work from top to bottom‚ allowing the soap to dwell on the surface for the recommended time (usually 2-3 minutes) before rinsing. Avoid spraying directly upwards‚ as this can cause soap to enter the machine’s internal components.
For stubborn stains‚ focus the spray on those areas for a longer duration. Remember to test the soap on an inconspicuous area first to ensure compatibility and prevent damage. Consistent‚ even application is key to achieving a thorough and streak-free clean.

Specific Sun Joe Model Soap Instructions
Each Sun Joe model may have slight variations in soap application. Consult your specific model’s manual for detailed instructions‚ ensuring optimal cleaning performance and preventing damage.
SJ5001P/SJ5002P Soap Instructions
For the Sun Joe SJ5001P and SJ5002P models‚ soap application is straightforward. First‚ ensure the unit is turned off and the power cord is disconnected. Locate the onboard soap tank – it’s typically a translucent container near the pump. Carefully fill this tank with a Sun Joe-approved detergent or a compatible pressure washer soap‚ avoiding overfilling.
Next‚ attach the soap nozzle (usually black in color) to the wand. Select the low-pressure soap setting on the pressure washer; this is crucial to prevent damage and ensure proper soap dilution. Start the washer and trigger the spray gun. You should observe a consistent stream of soapy water. Adjust the soap concentration dial (if equipped) to achieve the desired cleaning strength.
Remember to test the soap on an inconspicuous area first. After soaping‚ switch back to a high-pressure nozzle for a thorough rinse‚ removing all soap residue. Always rinse the soap tank and lines after each use to prevent clogging.
SPX3000/SPX3001 Soap Instructions
The Sun Joe SPX3000 and SPX3001 models feature a 2-in-1 nozzle with dedicated soap application settings. Begin by ensuring the unit is off and unplugged. Locate the large‚ onboard soap tank – it’s usually prominently displayed. Unscrew the cap and fill with a Sun Joe-approved detergent or a compatible soap‚ being mindful not to exceed the maximum fill line.
Attach the 2-in-1 nozzle to the wand. Rotate the nozzle dial to the low-pressure soap setting (often marked with a soap bottle icon). Power on the pressure washer and pull the trigger. The unit will draw soap from the tank and mix it with water. Adjust the soap concentration using the adjustable dial located near the soap tank to customize the cleaning power.
Always test the solution on a hidden area. After application‚ switch back to a high-pressure setting for a complete rinse‚ removing all traces of soap. Regularly flush the soap tank and lines to maintain optimal performance.
SPX2600/SPX2601 Soap Instructions
Sun Joe SPX2600 and SPX2601 models utilize a siphon tube system for soap intake. First‚ ensure the pressure washer is turned off and disconnected from the power source. Locate the soap tank opening‚ typically on the unit’s front or side. Insert the siphon tube (usually blue) fully into the soap container‚ ensuring it reaches the bottom.
Attach the soap nozzle (often black) to the wand‚ replacing the standard spray nozzle. When activated‚ the pressure washer creates suction‚ drawing soap from the container through the siphon tube. Adjust the soap concentration using the dial located near the soap tank opening; higher settings deliver a stronger soap mixture.
Begin application‚ testing on an inconspicuous area first. After soaping‚ switch back to the high-pressure nozzle for a thorough rinse. Regularly clean the siphon tube and tank to prevent clogs and maintain consistent soap delivery.
Troubleshooting Soap Application Issues
Addressing common soap application problems ensures optimal cleaning performance. This section provides solutions for issues like no soap dispensing‚ streaky results‚ or excessive foam buildup.
Soap Not Dispensing
If your Sun Joe pressure washer isn’t dispensing soap‚ several factors could be at play. First‚ verify the soap tank is adequately filled with a compatible detergent – ensure it hasn’t run dry during operation. Next‚ inspect the soap suction tube within the tank; it might be clogged with dried soap residue‚ preventing proper intake. Carefully remove and rinse the tube thoroughly with warm water.
Another common issue is a blocked soap nozzle. Detach the nozzle and check for obstructions‚ cleaning it with a small pin or wire if necessary. Confirm the soap selector switch on your pressure washer is correctly positioned to the “soap” or “detergent” setting. Also‚ examine the filter located within the soap tank inlet; a dirty filter restricts soap flow. Finally‚ ensure the pressure washer is operating at a low-pressure setting‚ as some models require reduced pressure for soap dispensing to function correctly.
Streaky Cleaning Results
Experiencing streaks after soap application with your Sun Joe? This often indicates improper rinsing or an imbalance in soap concentration. Ensure you thoroughly rinse the cleaned surface after applying soap‚ utilizing a wide spray pattern to eliminate all residue. Insufficient rinsing leaves behind a soapy film‚ causing visible streaks.
Experiment with adjusting the soap concentration within the detergent tank. Too much soap can lead to streaking‚ while too little may not effectively clean. Start with the recommended dilution ratio specified on your soap container and adjust accordingly. Also‚ consider the surface you’re cleaning; porous materials may require more rinsing. Finally‚ ensure your soap nozzle isn’t partially clogged‚ as uneven soap distribution can contribute to streaky patterns. Regularly cleaning your nozzle will help maintain consistent results.
Excessive Foam
Dealing with an abundance of foam during operation? Excessive foam typically signals an overconcentration of soap within the detergent tank. Immediately reduce the soap mixture by diluting it with water. Remember‚ a little soap goes a long way with pressure washers – more isn’t always better!
Check your soap selection; some detergents are inherently more foaming than others. Consider switching to a low-foam formula specifically designed for pressure washers. Additionally‚ ensure the soap intake valve isn’t stuck in an open position‚ continuously drawing soap. Inspect and clean the valve if necessary. Prolonged excessive foaming can potentially damage the pump‚ so addressing the issue promptly is crucial. Finally‚ avoid using household detergents‚ as they often create significantly more foam than pressure washer-specific soaps.

Maintaining Your Sun Joe After Soap Use
Post-wash care is vital for longevity. Thoroughly rinse the soap tank and flush the soap line to prevent clogs and ensure optimal performance for future cleaning tasks.
Rinsing the Soap Tank
After each use involving soap‚ a thorough rinsing of the soap tank is absolutely crucial. Residual soap left within the tank can harden and potentially clog the system‚ leading to diminished performance or even complete failure of soap dispensing. Begin by removing any remaining soap solution from the tank.
Next‚ fill the tank with clean‚ fresh water. Agitate the water vigorously by gently shaking or swirling the tank to ensure all interior surfaces are wetted. Empty the soapy water and repeat this process at least two to three times‚ until the water runs completely clear and free of any soap residue.
For stubborn residue‚ a mild detergent solution (specifically designed for cleaning purposes‚ not pressure washing) can be used initially‚ followed by multiple clear water rinses. Always ensure all traces of detergent are removed before resuming normal pressure washing operations. Proper rinsing extends the life of your Sun Joe and maintains consistent cleaning power.
Flushing the Soap Line
Beyond rinsing the tank‚ flushing the soap line is essential to prevent clogs and maintain optimal soap delivery. After rinsing the soap tank‚ detach the soap hose from both the tank and the pressure washer. Fill a clean bucket with fresh water.

Submerge the soap hose’s end (the one that connects to the pressure washer) into the bucket of clean water. Briefly activate the pressure washer‚ selecting a low-pressure soap setting. This will draw water through the soap line‚ effectively flushing out any remaining soap residue.
Continue running the washer for approximately 30-60 seconds‚ observing the water flowing from the other end of the hose to ensure it runs clear. Repeat this process if necessary until no soap is visible. Reconnect the soap hose securely to both the tank and the pressure washer. Regular flushing ensures consistent performance and prevents costly repairs.
Long-Term Storage Considerations
Preparing your Sun Joe for extended storage after soap use is crucial for preventing damage and ensuring future reliability. Before storing‚ thoroughly rinse both the soap tank and the soap line as previously detailed to eliminate all soap residue. Residual soap can harden and cause blockages over time.
Consider using a pressure washer antifreeze solution‚ specifically designed for these machines‚ to further protect the pump and lines from freezing and corrosion‚ especially in colder climates. Drain all water from the pump and hoses. Store the unit in a clean‚ dry environment‚ protected from direct sunlight and extreme temperatures.
Avoid storing the pressure washer with the soap hose still connected‚ as this can potentially lead to leaks or damage. Proper long-term storage significantly extends the lifespan of your Sun Joe pressure washer and maintains its cleaning power.